Removing a Skier from Footage Using ComfyUI Video Inpainting
I'm studying Computer Science part-time at HSLU Rotkreuz. One of our modules, COACH, basically lets you pick any project you want as long as you can justify it. Since I live and breathe Nuke(X), I thought this was the perfect opportunity to properly test ComfyUI for a real object removal task. An actual shot with actual problems.
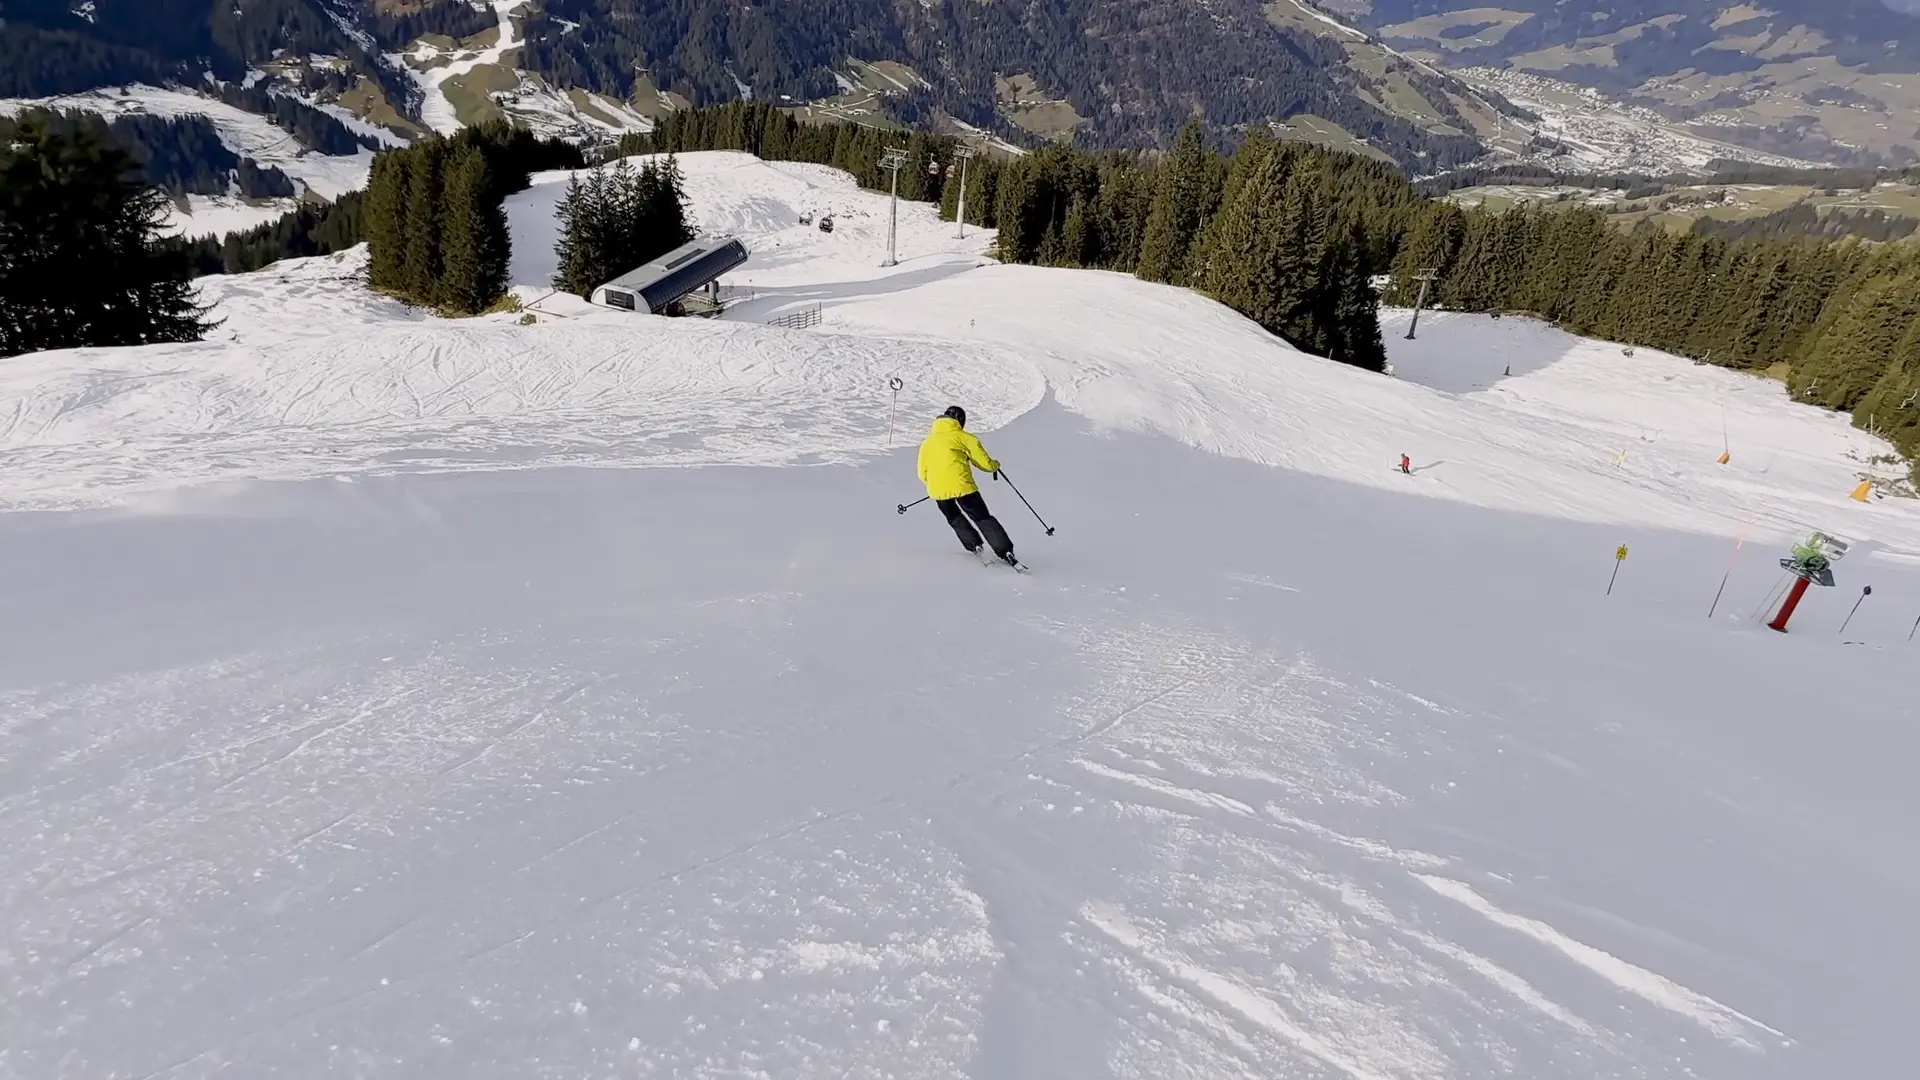
The footage: I filmed my friend Jeffrey (thanks Jeff!) skiing down a slope in Tyrol. I was following him with my phone in Action Mode, handheld. Since I wasn't planning on compositing that shot I did not film in any fancy codec an i'm stuck with 8-bit H.264. I reformatted it to 1080p since this is only a test. The goal is to remove Jeffrey entirely and reconstruct the snow behind him. Classic paint-out work that would normally take hours by hand.
This post is my hands-on follow-along of Foundry's course AI-Accelerated Cleanups in Nuke + ComfyUI. I basically took their workflow and applied it to my own footage. All credit for the approach goes to them — I'm just documenting what happened when I actually tried it.
The whole workflow I used will also be published on trickroom.ai if you want to take a look at it. (Coming soon)
This post documents what I did, what worked, and what didn't.

Preparing Your Workstation
ComfyUI
If you haven't come across it yet, ComfyUI is a node-based interface for running diffusion models. Think Nuke, but instead of Merges and ColorCorrects you're wiring up VAE encoders, KSamplers and ControlNets. The paradigm feels familiar if you're used to node graphs.
For VFX specifically, this is becoming relevant. Video inpainting, upscaling, rotoscoping assistance are workflows you can build today and which get better every week. It's not replacing Nuke but for tasks that are tedious by hand and where "perceptually plausible" is good enough, it's a useful tool to have in the pipeline.
I installed ComfyUI Portable using the Easy-Install script from Tavris1. It handles the Python environment setup for you:
https://github.com/Tavris1/ComfyUI-Easy-Install
Triton and SageAttention
You'll want both of these. Triton is an open-source compiler from OpenAI that generates optimized GPU kernels, so your model code runs more efficiently on the hardware. SageAttention is an optimized attention mechanism that reduces memory usage and computation time in the attention layers of transformer models. That means faster generations and you can process longer sequences without running out of VRAM.
This matters for video inpainting because we're not generating a single image but rather sequences of images.
I installed both using the script from DazzleML:
https://github.com/DazzleML/comfyui-triton-and-sageattention-installer
Workflow and Models
Download the workflow here. The links to the models are embedded in the ComfyUI workflow : AI-Accelerated Cleanups in Nuke & ComfyUI

Preparing the Footage in Nuke
Garbage in, garbage out. This applies even more when you're feeding footage to a neural network. The model doesn't know your plate has sensor noise baked in. It will try to preserve all of that, or worse, hallucinate on top of it.
Denoise
I ran the plate through Neat Video to clean up sensor noise, followed by a Soften node to remove the aggressive sharpening of the iPhone footage. The goal is to give the model the cleanest possible input so it can focus on the inpainting rather than fighting noise patterns. We'll re-apply grain later in comp using DasGrain.
Creating the Matte
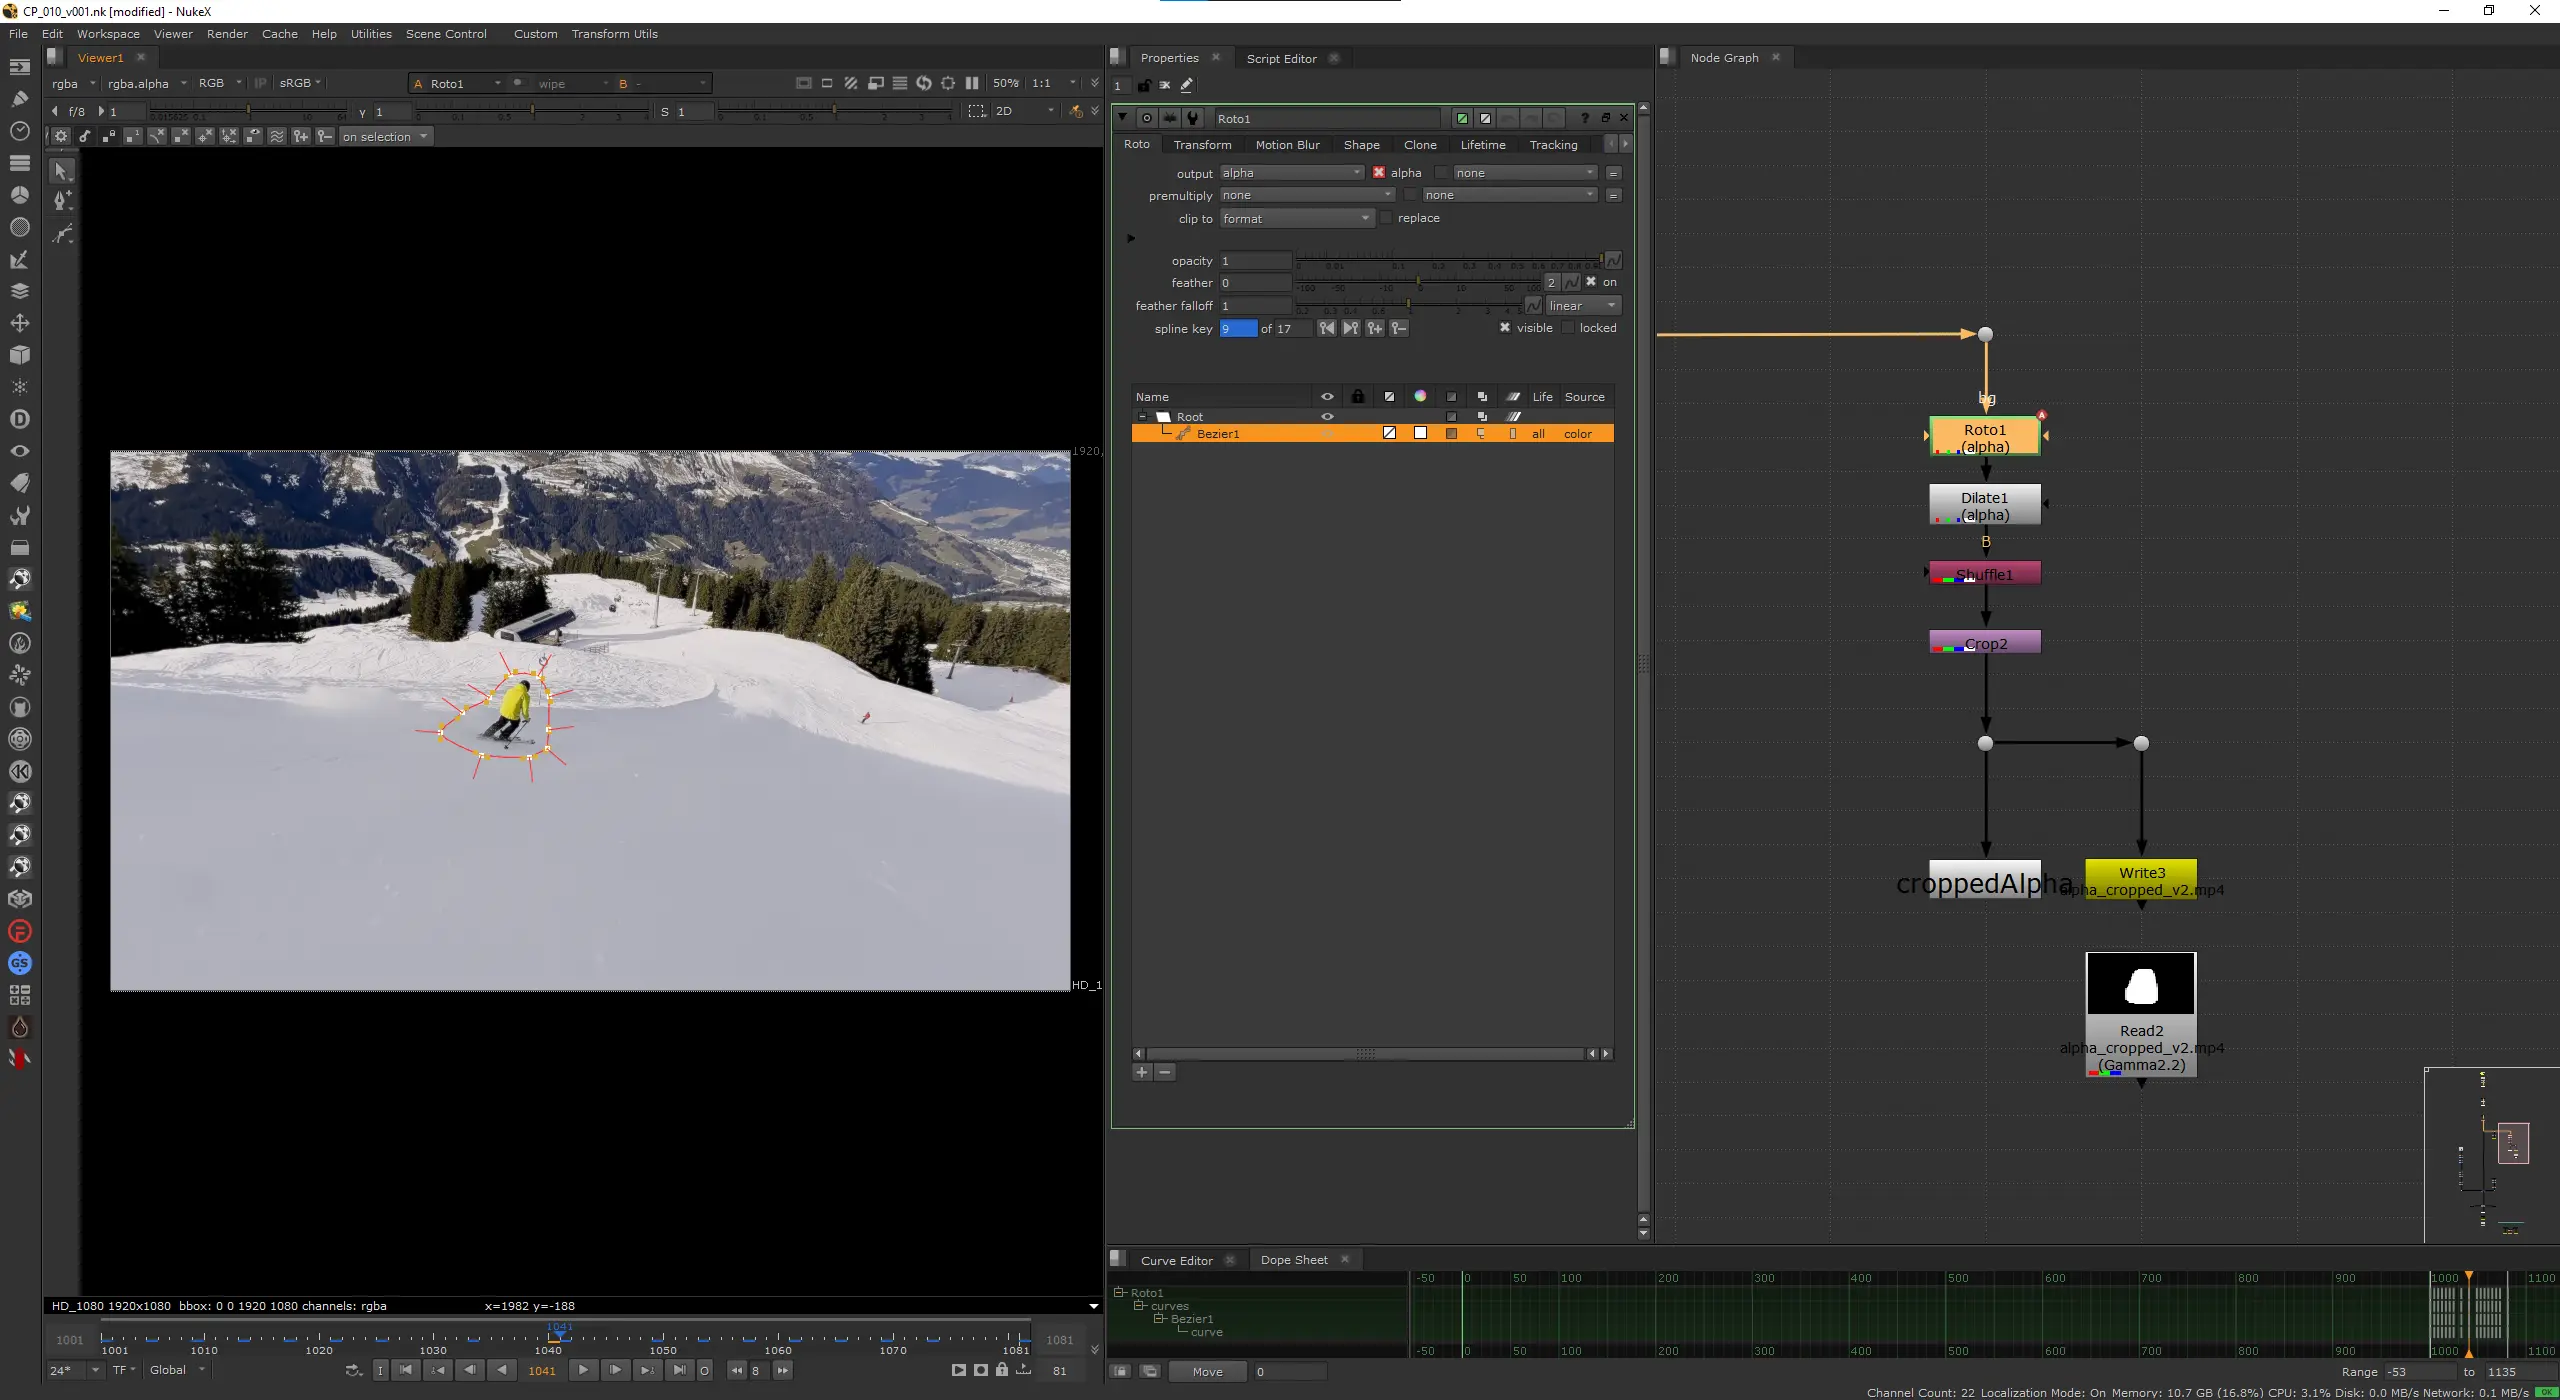
I manually animated roto shapes around Jeffrey like in the olden days since it was actually faster than fighting SAM or Modnet. There are two things that matter when creating your inpainting matte:
First, your shapes need to be bigger than the object you're removing. Give it breathing room. The model needs context around the edges to blend the inpainted region into the plate. If you trace the silhouette pixel-perfectly, you'll get visible seams or ghosting at the boundary. On top of the roto shapes I used a Dilate set to 32 pixels to push the matte out even further. This gives the model a solid buffer zone around Jeffrey without having to oversize every roto shape by hand.
Second, and this is the counterintuitive part, don't let the matte look like an object. If your shape closely follows the outline of a human figure, the model might interpret that silhouette as a prompt and try to generate something human-shaped to fill it. You want blobby, organic, roughly rectangular shapes. Think of it as "marking the region that needs new snow" rather than "masking the skier."
Cropping to Region of Interest
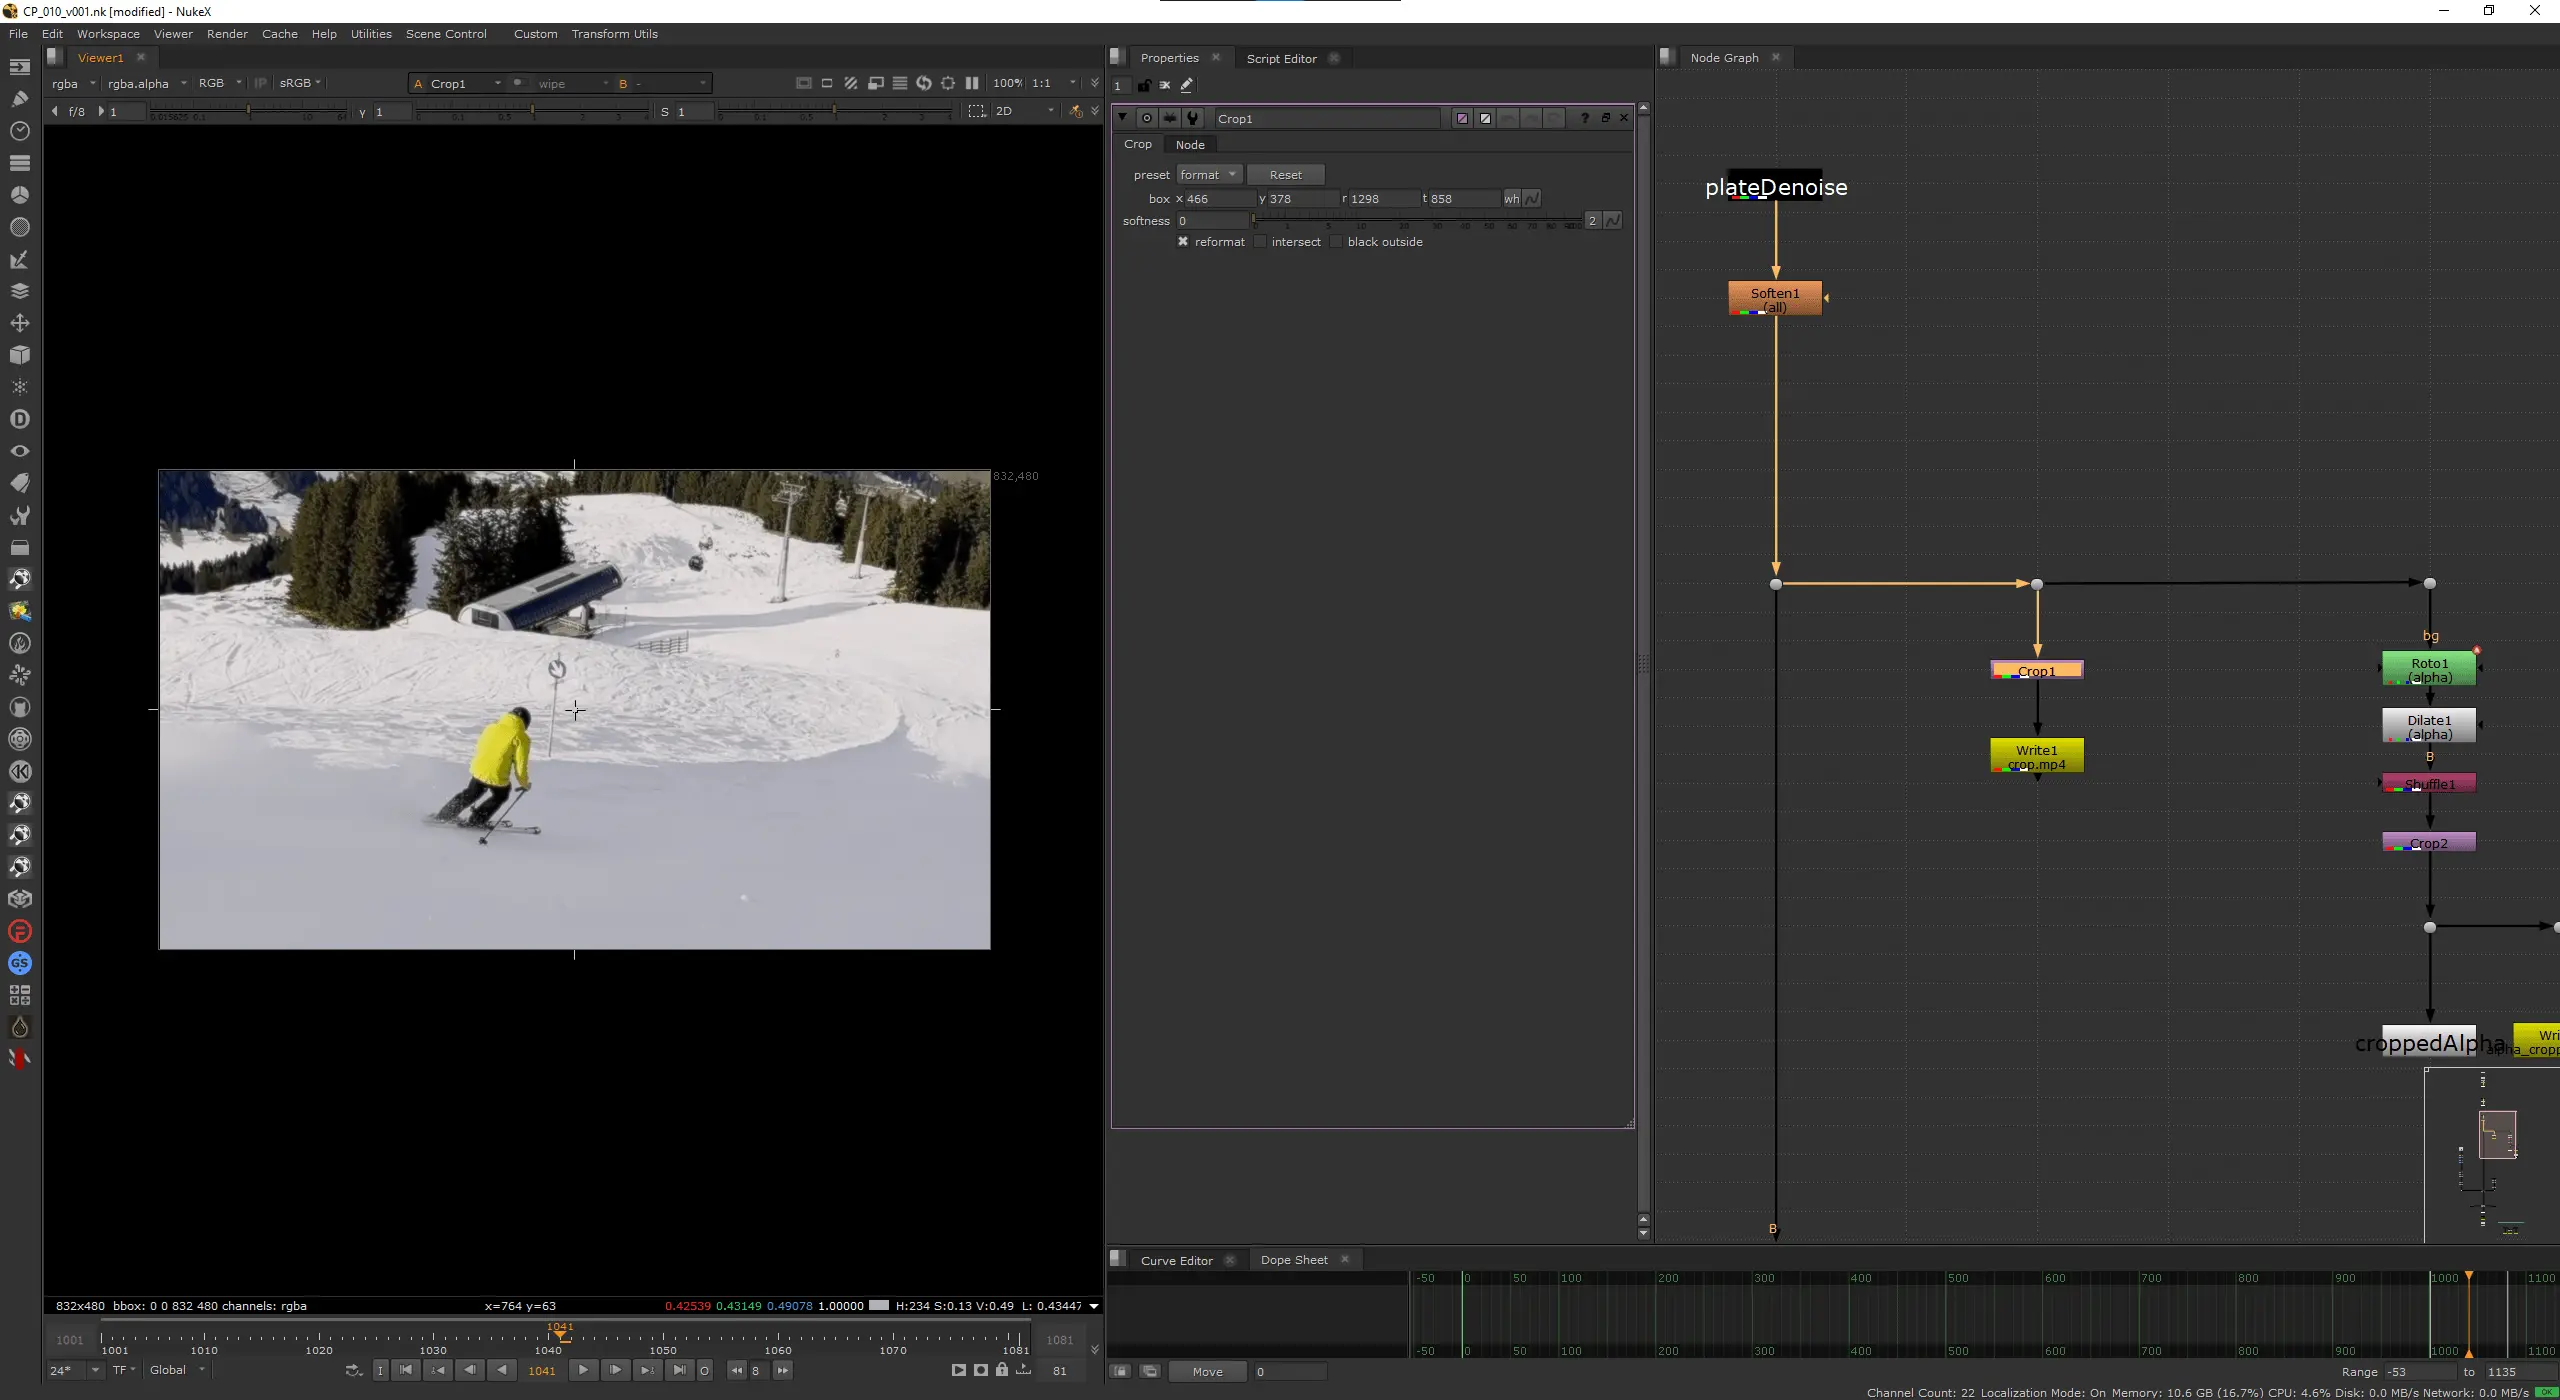
I cropped the image down to just the region around Jeffrey rather than feeding the full 1080p frame. The crop box was set to {466, 378, 1298, 858}, which gives a crop size of 832x480. The model was trained on these resolutions and diffusion models produce the best results when you feed them images at or near the sizes they were trained on. Deviate too far and quality drops, you get artifacts, or the model starts hallucinating structure that shouldn't be there. Both dimensions are also divisible by 64, which matters because the latent space is divided into patches at that granularity.
Cropping to the ROI also means the model only has to inpaint a fraction of the total frame rather than processing the entire 1080p image. Faster inference, less VRAM usage, and generally better results since the model can focus its capacity on a smaller area.
Exporting
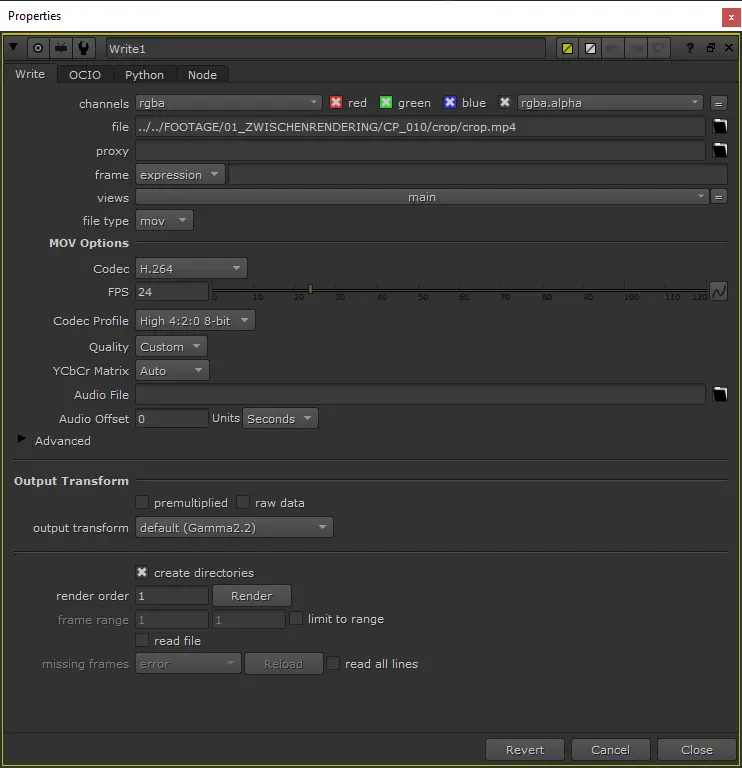
I exported two .mp4 files from Nuke using H.264 at a high bitrate: one for the cropped plate and one for the cropped matte. You could export EXR sequences, but that requires custom ComfyUI nodes to handle EXR input. For this test, not worth the complexity. H.264 and this resolution introduces minimal additional artifacts, and since we're already working with 8-bit phone footage, we're not losing much.
Make sure both files are the same duration and frame-accurate.
Running the Footage Through Inference
Loading the Footage
Open the workflow, load your footage and matte into the input nodes. Make sure the matte is aligned with the footage. If they're off by even a frame, the inpainting will hit the wrong region and results will be interesting in ways you don't want.
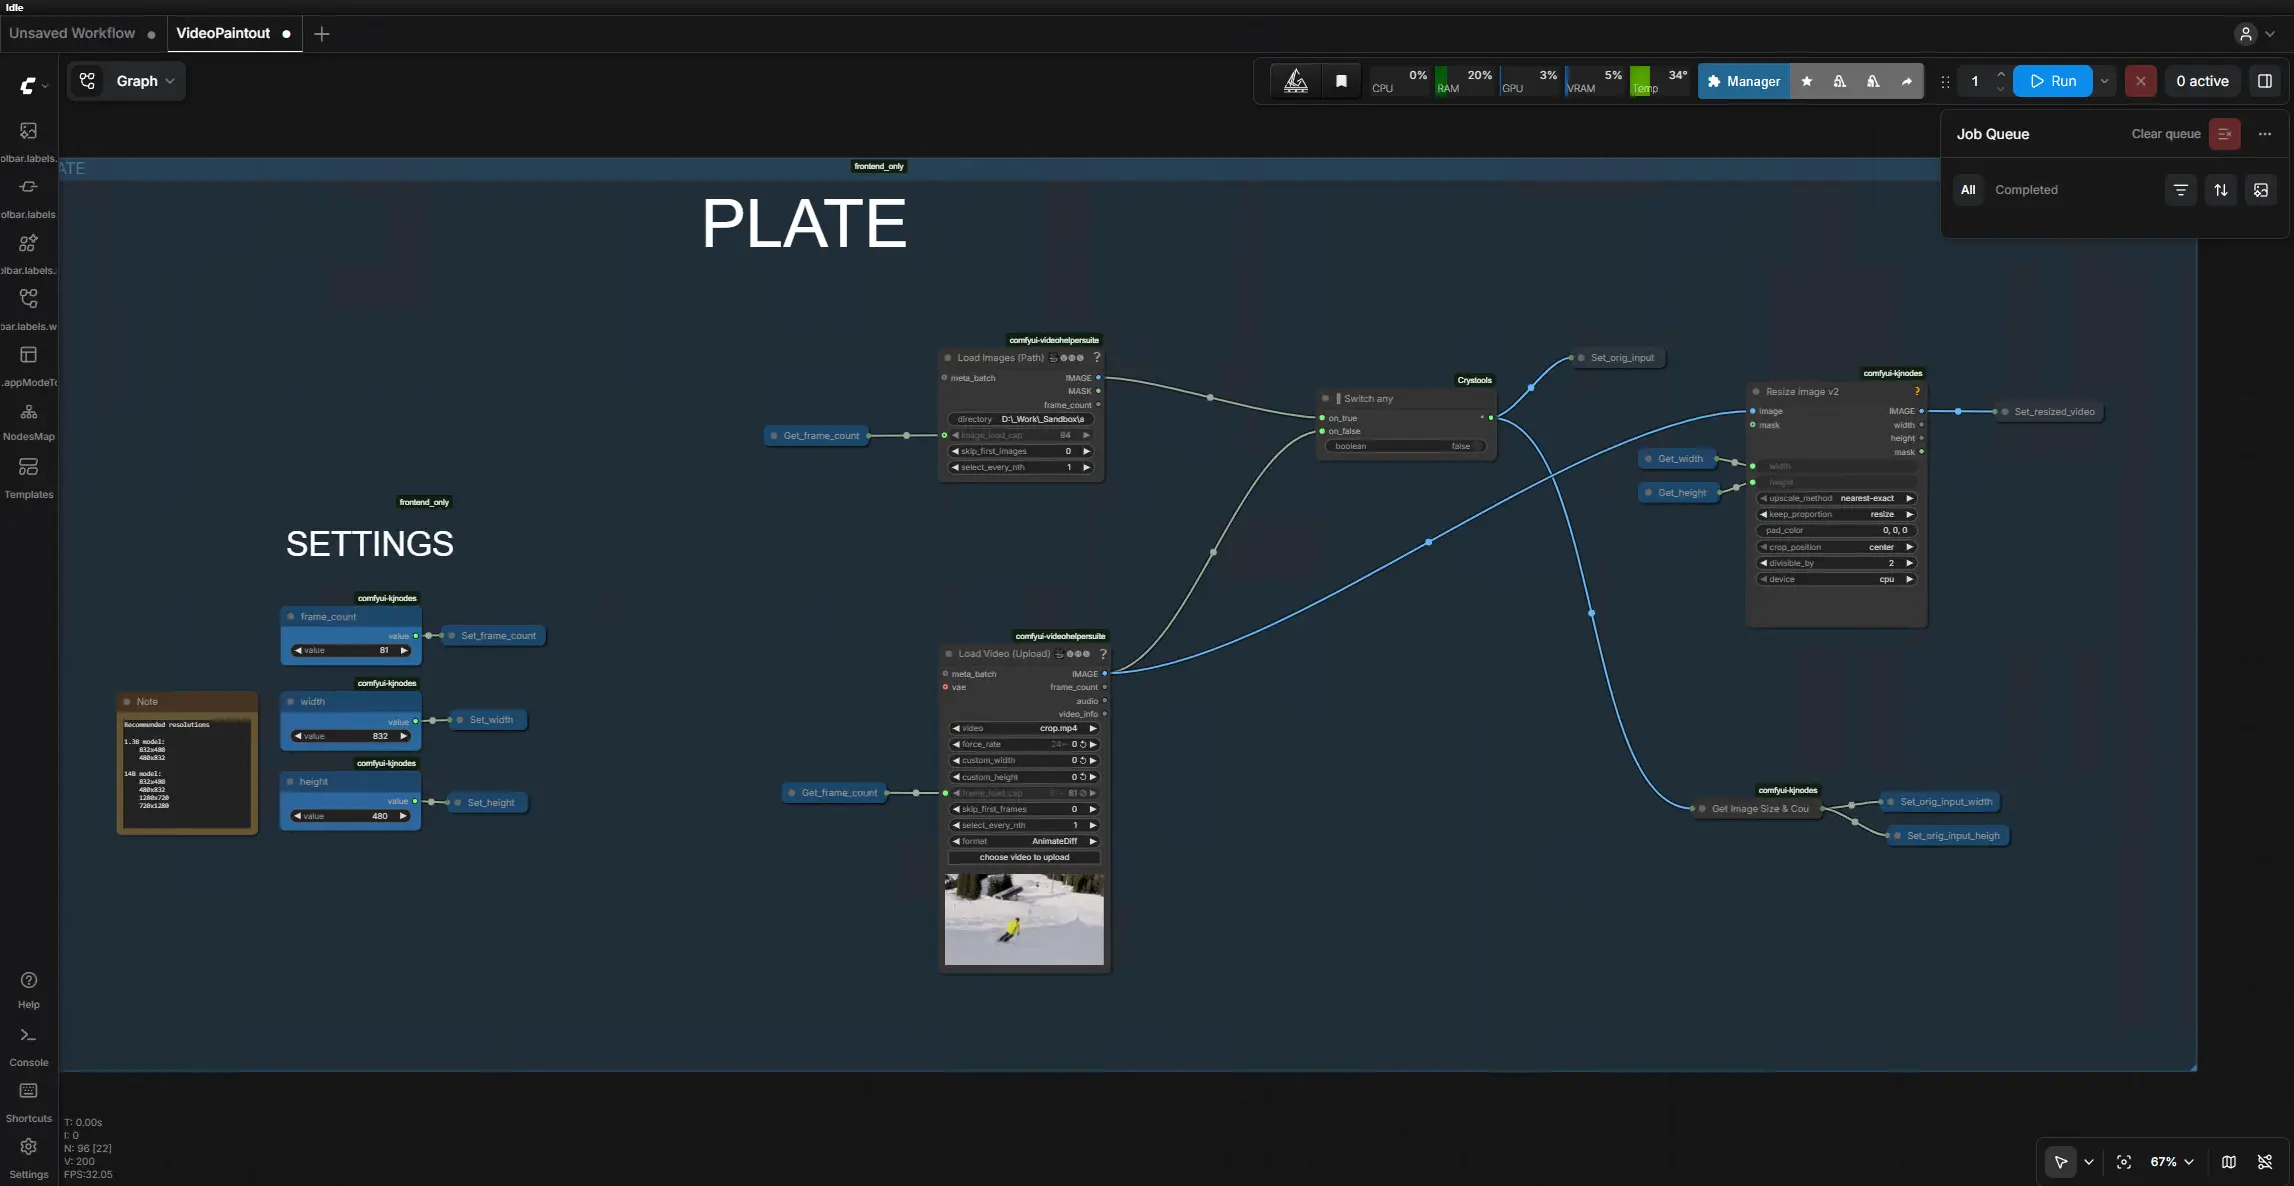
Iterating on Settings
This is where it stops feeling like traditional VFX and starts feeling like creative exploration.
Start with low steps, 6 to 10. Quick generations, good enough to tell whether you're in the right ballpark. At 6 steps a batch of frames processes in a fraction of the time compared to a full quality run, so you can afford to try things.
Play with the prompt. Even for inpainting, the text prompt guides what the model generates. Something like "snowy mountain slope, pristine snow, alpine landscape" pushes it in the right direction. Try different seeds until you find something that represents the outcome you want.
Once you find a combination that works, lock those settings and run again with higher steps. 20 to 30 for a proper quality pass. You can go higher, but I found diminishing returns past 30 on this shot.
Upscaling (Optional)
I ran the inpainted footage through an upscaling pass and it helped a lot on my shot. The inpainted region at 832x480 had some softness and micro-artifacts that became more obvious when placed back into the full-res comp. The upscale added plausible high-frequency detail that helped it hold up against the surrounding plate.
Your results may vary. Upscaling can sometimes amplify artifacts or introduce sharpness that doesn't match the rest of the footage. Test it on a few frames first.
Compositing the Final Result
Back into Nuke.
Loading the Inpainted Footage
Import the inpainted footage and position it back into the full 1080p frame. I used a Transform node with translate to place the 832x480 patch back into the exact crop coordinates.
Grading and Value Matching
The inpainted footage didn't match the plate out of the box. I needed a ColorCorrect, a Grade, and a Saturation node to bring it in line. It doesn't match perfect but for this test it's good enough.
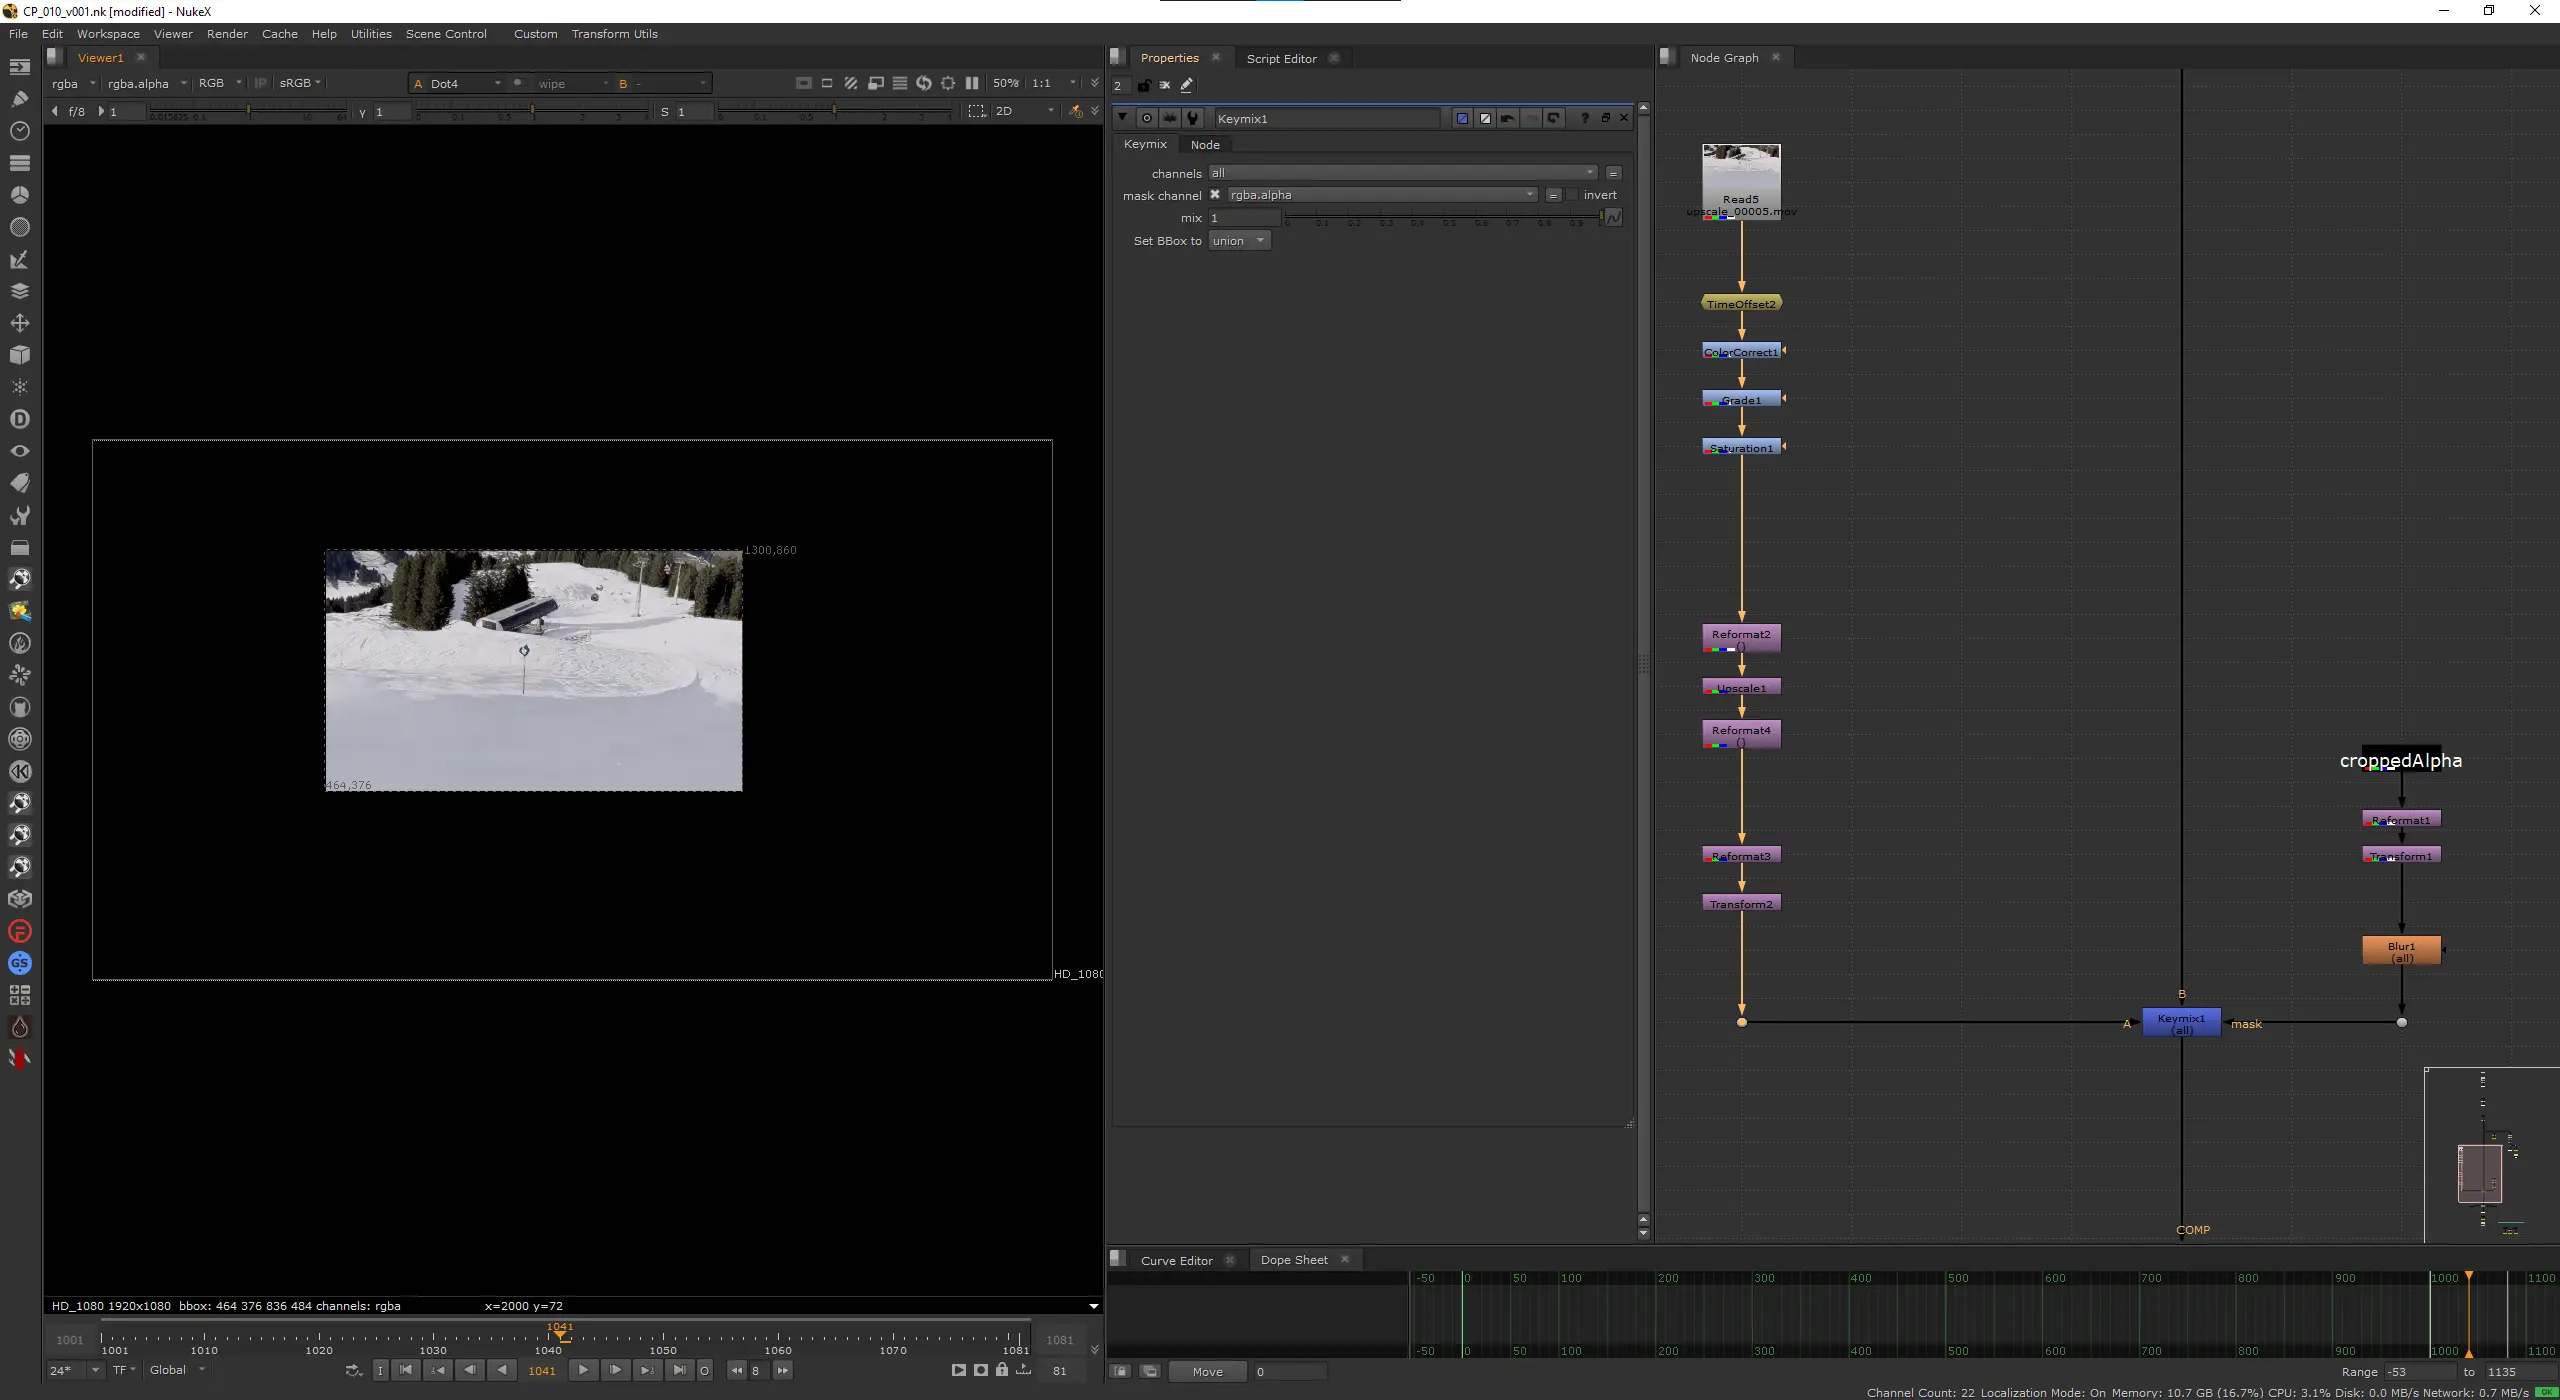
Keymix
For the keymix matte, I took the cropped alpha, reformatted it to the full frame resolution, transformed it back to position with the same {466, 378} translate, and then applied a Blur with a size of 24 to soften the edges. This gives a smooth falloff so the patch blends gradually into the plate rather than cutting in hard.
The Keymix node combines the denoised plate (B input) with the graded ComfyUI result (A input), driven by the blurred matte. Keep as much of the original plate as possible.
Re-Applying Grain with DasGrain
The inpainted region came out of a diffusion model, so it's unnaturally clean so I used DasGrain, which analyzes the grain response curve of the original plate and re-applies a matching grain profile to the comp. It's the standard approach for regraining.
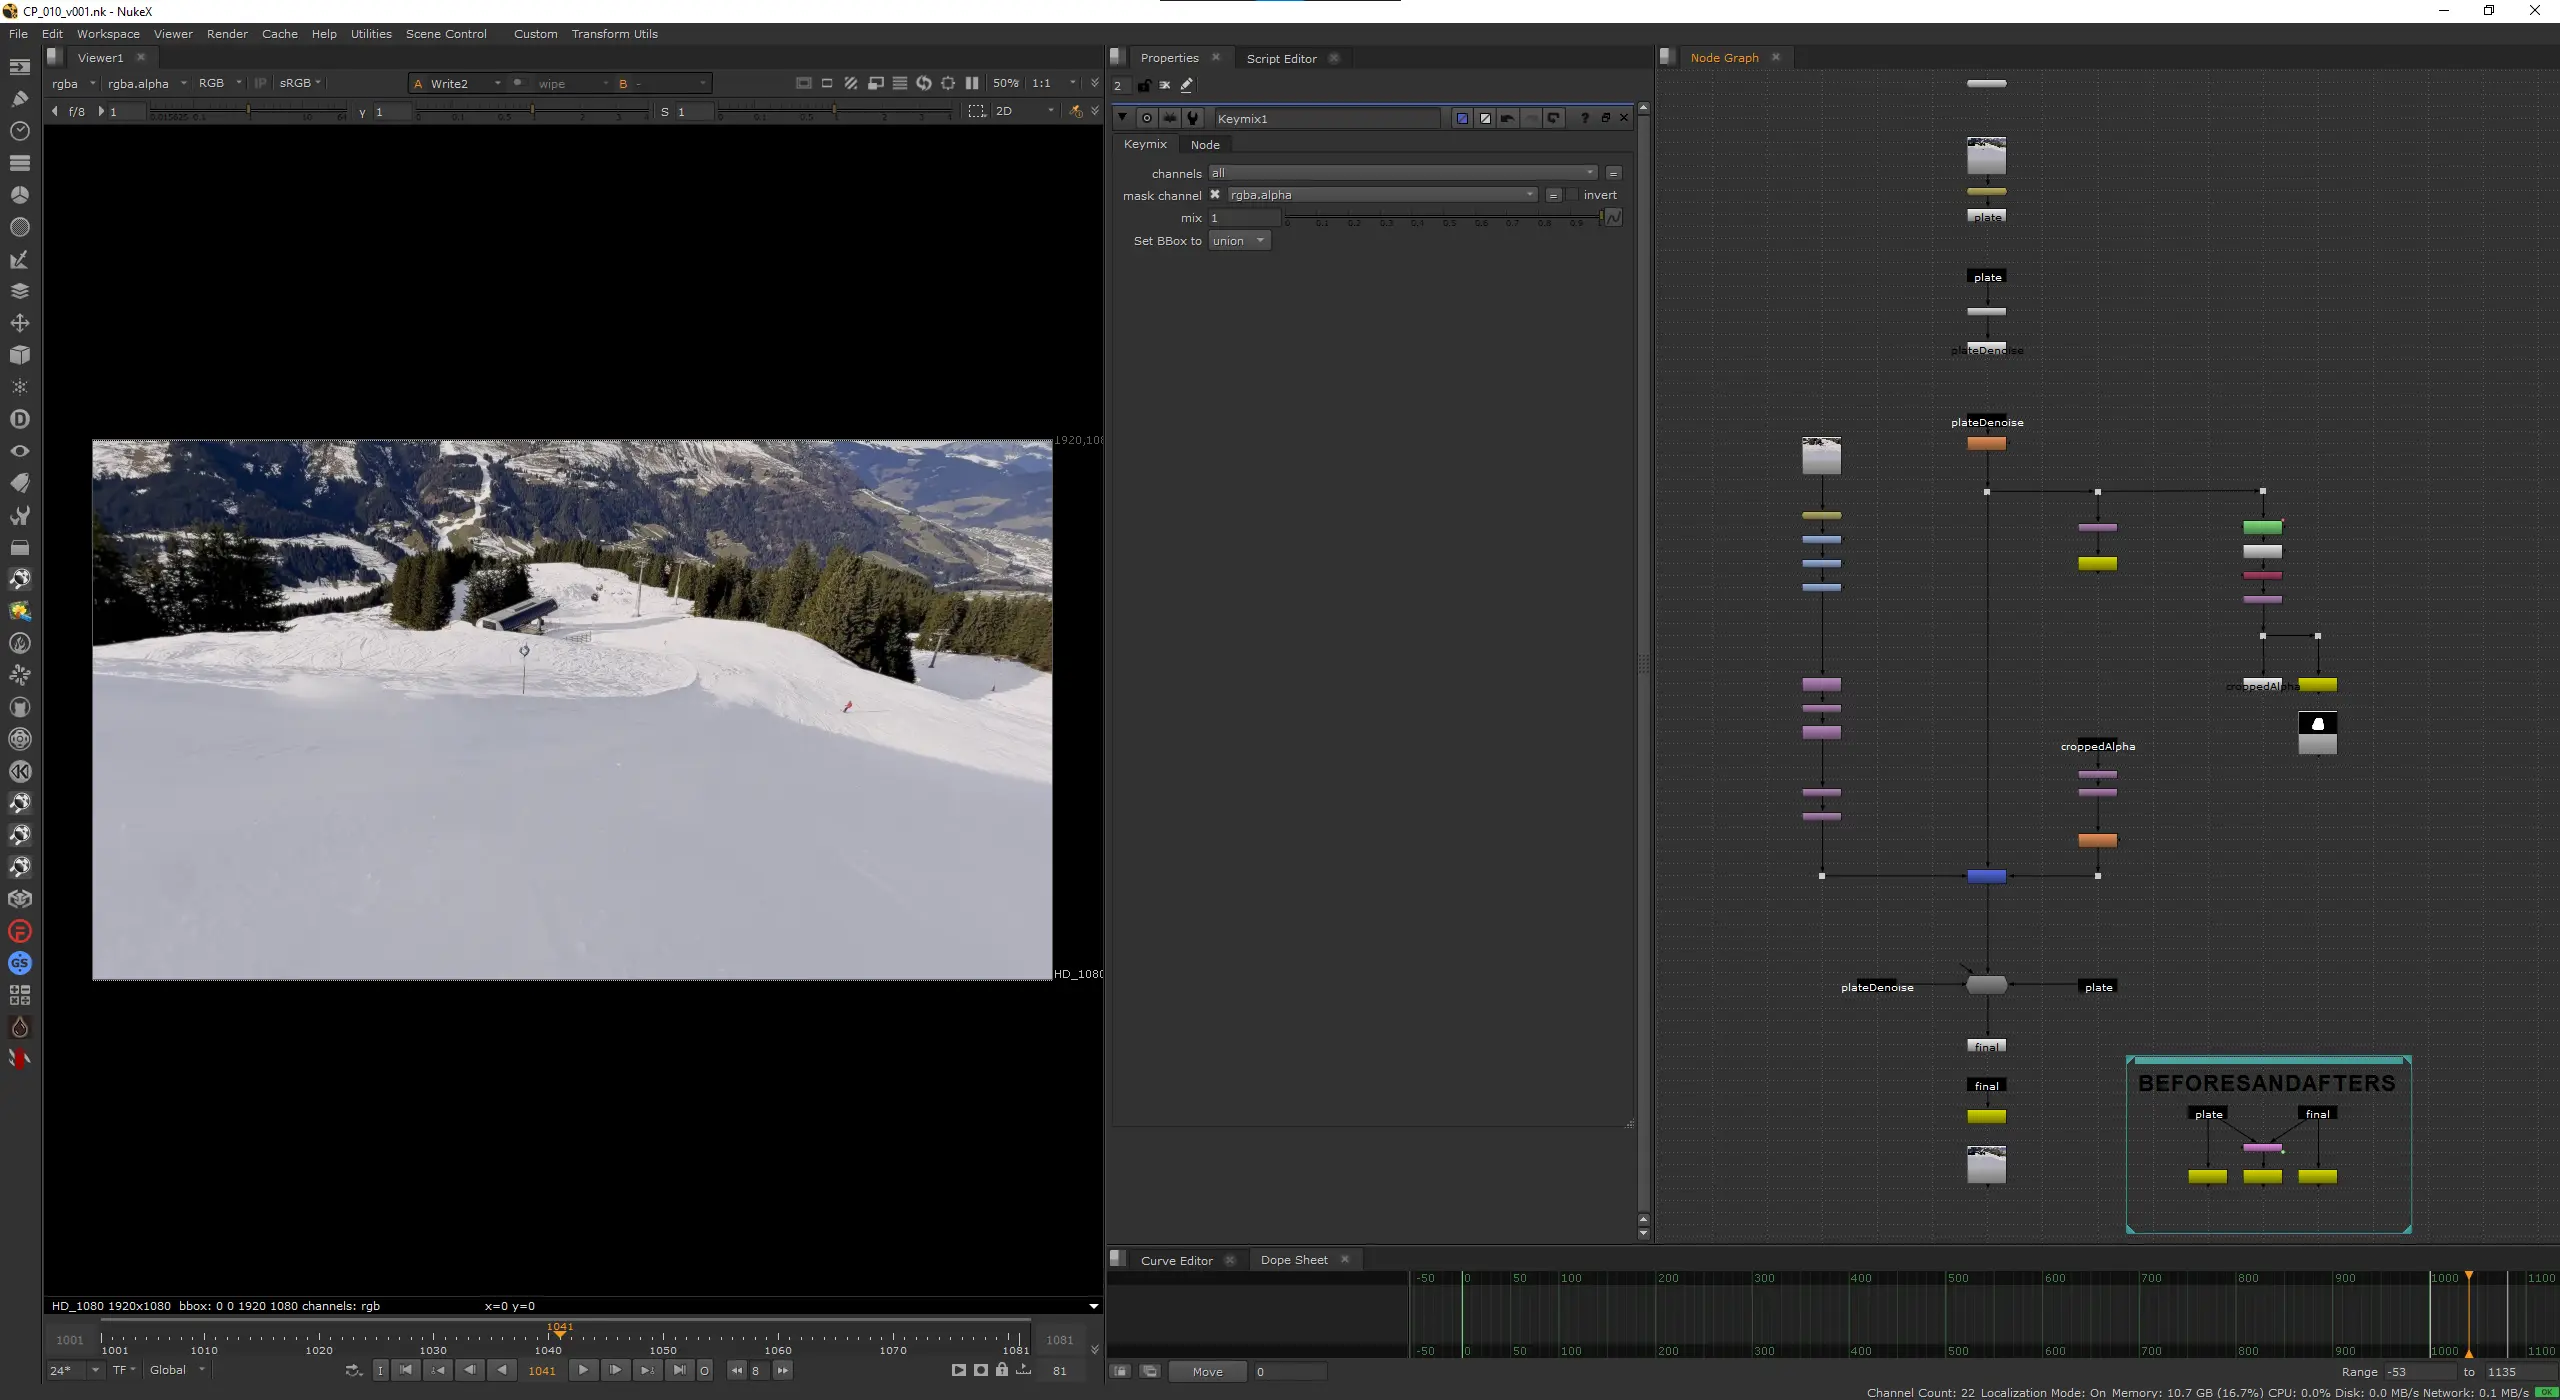
Conclusion
Does it work? Kind of. It's not pixel-perfect and the patch introduced some artifacts that need manual cleanup like sign on the slope. But I think that's the whole point. Working with ComfyUI can jumpstart the shot from 0 to 75% in no time and from there you take over and fix things manually like before. Fixing minor issues and taking the shot to the finish-line is something we get to keep as VFX artists (for now)!
The COACH module at HSLU gave me the freedom to explore this properly. Understanding how these models work, what they expect as input, and where they break is going to matter more and more for compositors in the next few years. Better to start now.
Try It Yourself
I've packaged the entire project so you can follow along with your own setup. The download includes the original footage, the matte and the Nuke script with all the settings I used. Everything you need to reproduce what I did here or use it as a starting point for your own tests.
The ComfyUI workflow is also available directly on trickroom.ai if you just want to grab that and run with it.
If you run into issues or get interesting results, I'd love to hear about it.